
DIY Specialist - Natalya Konforti
- DEA
- Apr 20, 2020
- 4 min read

Updated: Jan 28, 2021
Written by Natalya Konforti
Quilting with Plastic Bags/Paper
Lately the quarantine has inspired me to push traditional crafting boundaries. While I personally have no shortage of supplies on hand, I’ve found myself thinking about those using this extra free time to get into new hobbies but with most stores closed, aren’t able to shop for material.
Seeing as the past few weeks of grocery deliveries has translated to a plethora of unwanted plastic bags, something everyone likely has at home, I’ve been up-cycling them into quilted art.
If you’ve managed to somehow avoid plastic bags during this time, kudos to you! I’ve also used the shrink wrap from our toilet paper rolls and the packaging from pasta or rice. If you prefer to go plastic free, I’ve also made a paper version (no sewing required!).
Plastic Quilting

Image courtesy - Natalya Konforti
Required Materials:
- Plastic bags or other plastic packaging
- Masking Tape
- Scissors
- Permanent marker
- A printed quilting pattern
- Needle (a medium to thin size with a sharp tip such as a beading or crewel needle is best, avoid cross stitch needles with dull tips)
- Thread (regular sewing machine thread is fine)

Step 1:
- Gather your plastic or paper. Cut the handles, bottom and one side of each plastic bag to form a flat sheet. Try to get a broad selection and choose a few within a similar color range.
- Aim for a variety, for the paper version I mixed newspaper, wrapping paper, a magazine clipping and construction paper.
- I’ve found that loud and tacky patterns like those from advertisements actually translate really well into quilting.
- Prefer slightly thicker, opaque plastics
Image courtesy - Natalya Konforti
Step 2:
- Print out a quilting pattern, you can find lots of quilting square designs with a quick google search. The lotus motif I worked on here is a Khayamiya pattern from The Tentmakers of Cairo.
- Check how many colors your pattern requires and choose a different plastic bag or paper for each color.
Step 3:
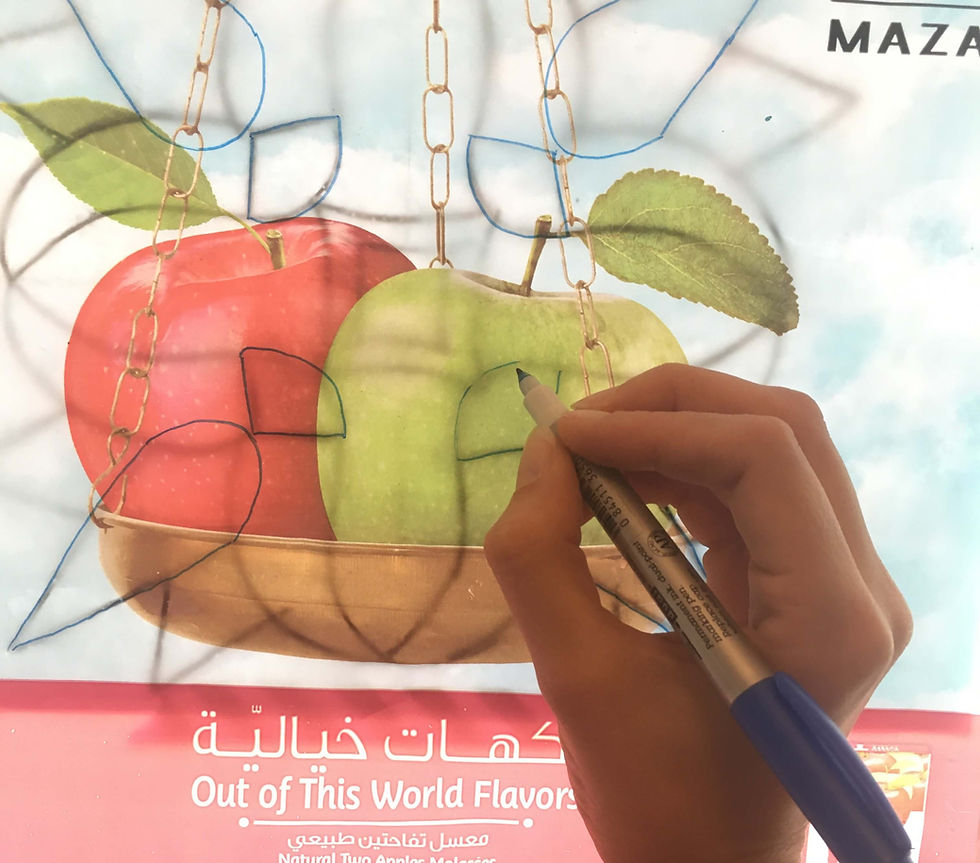
- Transfer your quilting pattern. Tape your pattern to a window, then tape your plastic over it.
- Using a permanent marker trace over the shapes for one color. If there are spaces where your shapes overlap, take this into account, you may need to extend one shape so that it fits under the others such as overlapping squares on quilt patterns.
- Repeat this step with a different sheet of plastic for each of the colors and one for the background.

Step 4:
- Cut out all the shapes.
- Choose a large plastic sheet for the background and tape all the shapes on the background to recreate your quilting pattern.
- Make tiny dots around the edges with the tip of your marker so that it’s easy to find your placement if anything shifts.
Image courtesy - Natalya Konforti

Step 5:
- Starting with the bottom layer, begin attaching your shapes to the background using a blanket stitch.
- You may need to temporarily move the overlapping pieces out of the way. Remove the pieces of tape as you go along stitching around the border of each piece.
Image courtesy - Natalya Konforti
Paper Quilting
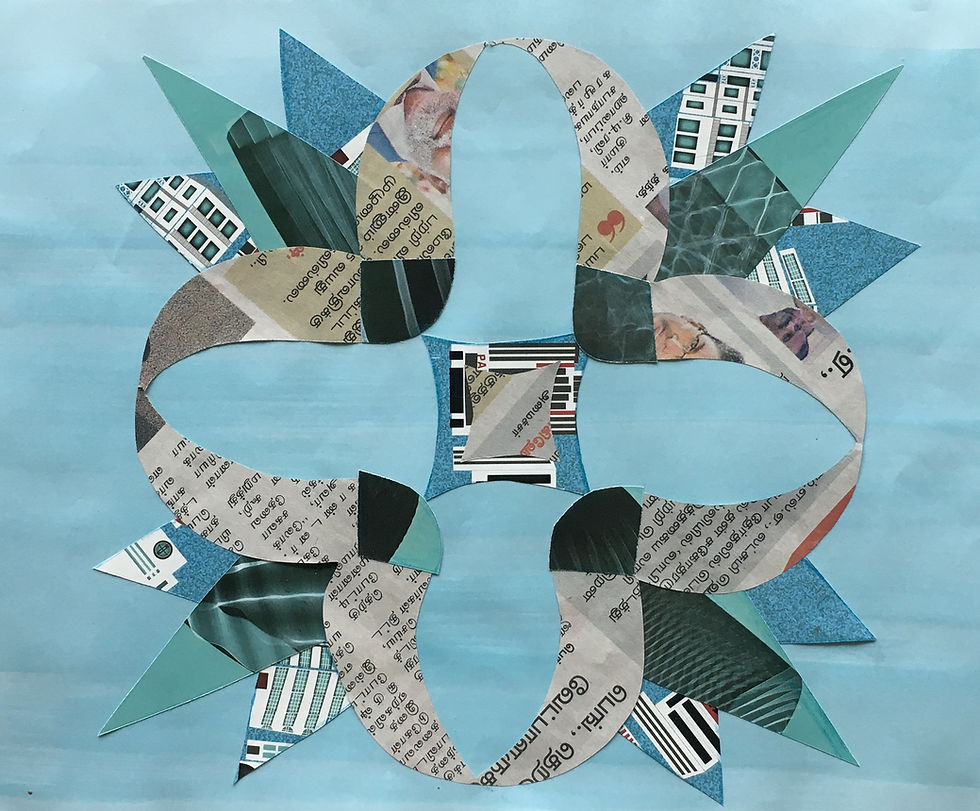
Image courtesy - Natalya Konforti
Required Materials:
- Scrap paper
- Scissors
- Pencil
- A printed quilting pattern
- Glue
Step 1:
- Gather your paper. Try to get a broad selection and choose a few within a similar color range.
- Aim for a variety, I mixed newspaper, wrapping paper, a magazine clipping and construction paper, but flyers, ads, old bills, origami paper and paper bags could be used as well.
- I’ve found that loud and tacky patterns like those from advertisements actually translate really well into quilting.
Step 2:
- Print out a quilting pattern, you can find lots of quilting square designs with a quick google search. The lotus motif I worked on here is a Khayamiya pattern from The Tentmakers of Cairo.
- Check how many colors your pattern requires and choose a different paper for each color and one for the background.
Step 3:
- Transfer your quilting pattern. Tape your pattern to a window, then tape one of your papers over it.
- Using a pencil, trace over the shapes for one color. If there are spaces where your shapes overlap, take this into account, you may need to extend one shape so that it fits under the others such as overlapping squares on quilt patterns.
- Repeat this step with a different paper for each of the colors.
Step 4:
- Cut out all the shapes. Place them on your background to recreate the printed quilting pattern.
- Make a few light pencil marks around the edges so that it’s easy to find your placement if anything shifts.
Step 5:
- Starting with the bottom layer, glue your shapes onto the background.
Get creative, try combining a bunch of quilt squares to create a large-scale piece or try designing your own pattern!
About the Glitches and Stitches:
Glitches & Stitches is a homegrown brand focused on promoting the value of craftsmanship and artisanal skills. In addition to a capsule collection of hand embellished textile accessories, they also host a number of creativity-focused workshops in Dubai such as DIY cosmetics, textile printing and hand embroidery.
Launched in 2018, G&S is the brainchild of designer Natalya Konforti. After spending 8 years in China’s fast fashion industry designing garments manufactured by the hundreds of thousands, she yearned for the soul & personality of artisanal craftsmanship. Upon moving to Dubai, she decided to leverage the skills honed developing samples to help other ‘design junkies’ become self-sufficient.
About Natalya Konforti
Like so many others in Dubai, Konforti has a multi-cultural background having spent her childhood in Florida, studied fashion design at Esmod in France and continued her career in Asia before landing in Dubai. Passionate about creativity, but not fond of the elitism it's often paired with, she advocates for the importance of having a creative outlet, not only as a channel of self-expression but also for virtues of self-care and mindfulness.

Show Natalya some love here:
Insta: @glitchesandstitches
Image courtesy - Natalya Konforti
Want to be featured? Click here for more information
Join our Creative Textile Community!


Comments